I've never taken a shop class, used a drill or known the difference between a glue stick and wood glue. But still, I've got the bug.
It started with following other blogs. There are some Nobel Prize winning mothers out there who raise chickens, make all their kid's food natural and organic, photograph their adorable children and photoshop the heck out of them, scrapbook professional pages, run marathons and build all their own furniture in their amazing workshops with all their great tools.
I am not one of these women.
But, I don't have to be. There wouldn't be Nobel Prize winners unless there were people like me to compare them too. I'm ok with that.
This is not an attempt to "keep up with the Joneses" and reach these amazing motherhood achievements. Really, I just have a ton of clothes for EV and have no place to store them...oh, and a small budget. Let me point out all of these clothes were lovingly given to me by Samantha Brandt and Michelle Gardner. I appreciate all of them but apparently their children have enormous closets.
It isn't like we couldn't afford a nice piece of furniture for storing her clothes, I just don't feel like spending money on nice furniture when kids are small. When they're older...yeah, probably not then either. Ok, when they've gone to college. But by then all my money will be tied up in college and not in furniture...maybe when I'm retired? I digress...
This is what I want to build:
 |
| Land of Nod |
 |
| ClosetMaid |
The first one of these cubes is going to cost me quite a bit but I hope the next ones are less expensive as a move on. The reason the first one will be higher is the prep work that is going into me learning how to build something. Since beginning this adventure I have realized I should have spent more time with my dad out in his workshop. My dad is simply amazing at a lot of things and one of them is building. He used to build homes...like ours for instance, and my Aunt's house. He was the Marx of Lewis & Marx Construction. His workshop has handheld as well as the big tools no one ever seems to own unless they are on a makeover show on HGTV. My workshop? Well, you'll see in a bit what I'm working with...
Ed and I decided to create a rough draft bookshelf. We plan on using plywood for the sides and hardwood for the frames. Now how we do that seems to differ by the day. My budget for the rough draft was as low as I could get it. Ed was shooting for $30. Me? More like $15. I don't want my total for this project getting higher and higher until I hit the $349 and should have just bought the Land of Nod nice pieces.
Let's see how it turned out. Cue the picture montage...
First off, the scrap pile at Lowe's is amazing. I purchased all these pieces of mdf for $0.25 EACH! Two of these pieces became shelves, the rest are now in my scrap pile.
Here are the pieces we actually used: $11.47 piece of ratty looking pine plywood, 3 1x2s which were $0.75 each. I also had to buy nails since we didn't have a size small enough to not go through the wood.
This is our "workbench"...aka, our lawn furniture with wood across it. Ed did the cutting (scary picture to follow) and I was the clamp. Side note: we bought a clamp today since I'm not the best clamp.
Also a work bench: our not level at all porch at our rental house. We roll big here in Bloomington.
What we lacked in tools we made up for with assistance...EV. All of her measurements had to be double checked however. Here Ed is building the frame and I'm amazed both sides came out matching. I think he just eyeballed it since we didn't have a proper work surface. Also, we should have been using the drill and screws, not the nail and hammer. We learned a lot through this rough draft...
For instance, I learned to just look away while Ed is using the hand saw. This looks safe, right???
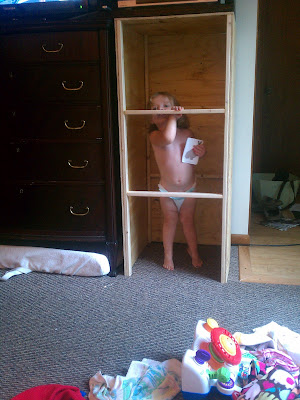
This was our first level of "done". Notice how you can see the frame and the plywood in the front? Oh, and there are clearly no shelves yet. We also learned the stability was not great through our amazing helper EV. This was officially the worst bookshelf ever made...
Here is a closer look at the front: frame and plywood are not pretty. It hadn't been nailed in yet either, that's why there is some space between the two. Actually, after it had been nailed in there was space too...oh well.
Using our left over pieces of 1x2s Ed made a face. It looks so much better.
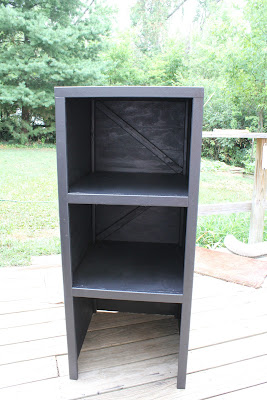
And even better with paint:
With moving we have received coupons for discounts around town. All we did is move across town but if you change your address with the USPS they send you free stuff. I received a coupon for 2 free pints of Benjamin Moore paint. This paint is meant to go on walls and it is pretty high quality stuff. I felt bad using it on this rough draft project but for free, I got over it. We also added the diagonal pieces in the back to not have so many right angles which were not stable. Anyways, since it is now the second worst bookshelf ever created, it now lives in the house. We needed something to go next to the dresser in our living which doubles as our entertainment center. It is a hideous idea using a dresser but it keeps it high enough out of EV's reach, I got over how ugly it all is. I don't think this bookshelf helps in the bulky and ugly department but it now holds the cable box, dvd player and Wii high enough.
Couple things I learned:
1. For my actual project I need nicer plywood.
2. EV is a great helper.
3. We need to buy a clamp (done!)
4. Ed and I don't start off communicating well but we get better after we have time to form our ideas before attempting to explain.
5. I should have taken shop class.
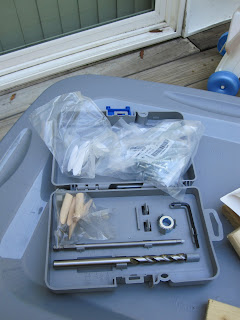
6. Building a frame for the plywood was a lot of work. I would have loved to have gone into the side of the plywood straight into 2x2s I could use as posts. Enter my Mother's Day in August present:
We spent $40 for the Kreg Pocket Hole Jig Jr. and another $20 for the clamp. The clamp wasn't necessary, a cheaper one would have done. I'm in love with this thing. We researched the more expensive set but a seemingly very knowledgeable older man at Lowe's says he builds cabinets for a living and still prefers the smaller set. Sold.
What we did today:
My first pocket hole! We used the coarse screws which is ideal for plywood, not for hardwood like I was working with.
This sucker isn't going anywhere!
I also was able to get over 14 feet in nice 1x12 wood in the scrap pile for $1.75. This much would have cost me around $40.00. Sweet!
Ed and EV are leaving for a trip up to my hometown and while they're gone I plan on testing out more pocket holes.
My total budget came in at $16.21 including:
1 piece pine plywood (ugly kind, cheap)
3 1x2 furring strips
Box of nails
Scrap mdf
free paint
free labor (thanks Ed, too hot for me out there)
The budget will increase since I bought this pocket hole jig but I'm fine with that.


Wow!!! I think it looks great - good work!!
ReplyDelete